ON7LDS Nextion Display Driver Installation
Guide Page 13

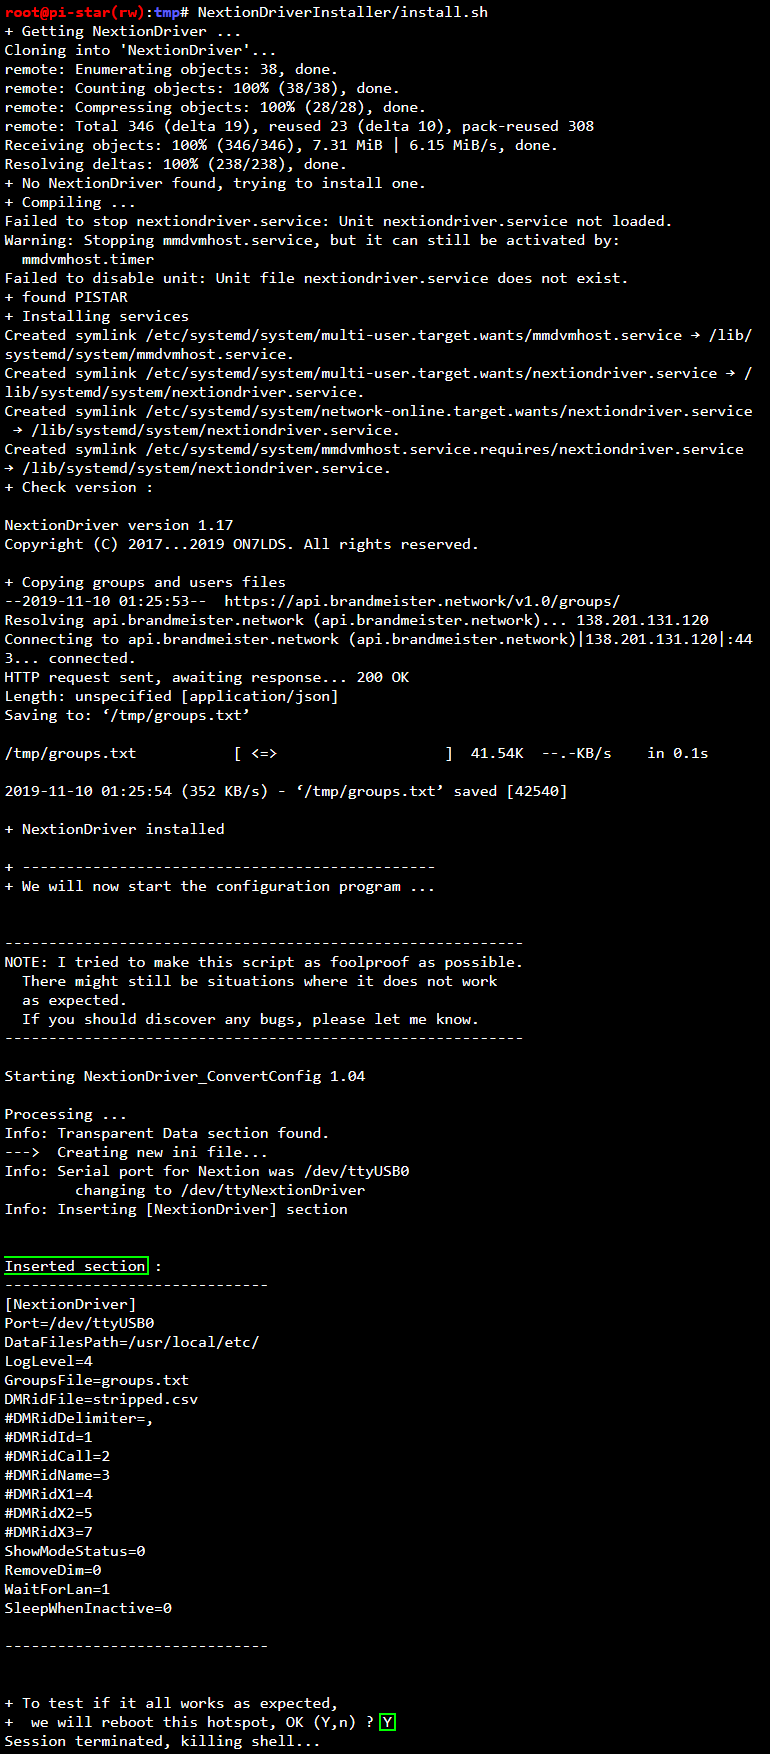
The operating system will begin to execute a script that will download everything else. It will then compile the Nextion Display Driver, install it, and make any needed operating system changes to glue it all together. I've provided what I recorded to give you some clues to what you should similarly see.
At this point right here is why the Nextion Display has to be already working. This installer will “READ” the Nextion Display setup values, modify them, and “Insert” the Nextion Display Driver into the already established serial pathway.
The “Inserted Section” is the added part to the MMDVMHost Settings file. These are the Nextion Display Driver Settings that affect how the Nextion Display Driver works.
At the bottom, when it's finished, we will answer “Y”. It will reboot the Pi-Star Hotspot and the added features of the Nextion Display Driver should begin to work. Congratulations, you just installed the Nextion Display Driver on your Pi-Star Hotspot.

When the Pi-Star Hotspot finishes rebooting, this page should say “Connect” in the middle of it. If that didn't happen, log back in and use the beginning parts of this guide to get back to the “Pi-Star Digital Voice - Expert Editors” menu. Then Click/Tap on the “MMDVMHost”. Then return to the Next Guide Page, Number 14.

Go back up to the menu again and Click/Tap on the “MMDVMHost”. Scroll back down to the “Nextion” Section, and now, below it should be a “NextionDriver” Section.
Proceed to the “Next Guide Page” by clicking on the “Right Pointing Arrows”.


